Quick Studs — Additional Grip for Your Alternative Hoof Protection
go to the online shopSpikes - Tungsten Carbide Pins for Alternative Hoof Protection with Plastic Coating
Everyone knows about tungsten carbide pins as an add-on for additional anti-slip protection for horseshoes - but what if the horseshoe is not made of steel or aluminum, but is an alternative hoof protection with plastic coating?
The answer is quite simple: What the carbide pin is for the steel shoe, the screw-in spikes are for the plastic hoof protection - regardless of whether it is a hoof boot, a pure plastic shoe or a composite shoe like ours.
Screw-in studs, like tungsten carbide pins, are intended as a preliminary step to studs - that's probably why many of our customers also call them quick studs. These quick studs offer a certain additional slip protection. However, compared to studs, they have the advantage of a reduced risk of injury and less stress on the horse's leg.
For additional grip, we usually use two quick studs in the heel area of the shoe. For an "ordinary" leisure or endurance rider, this simple measure is often sufficient as an additional anti-slide protection. Of course, you can't say that as a general rule.

Quick Studs as Additional Anti-Slide Protection – Photos
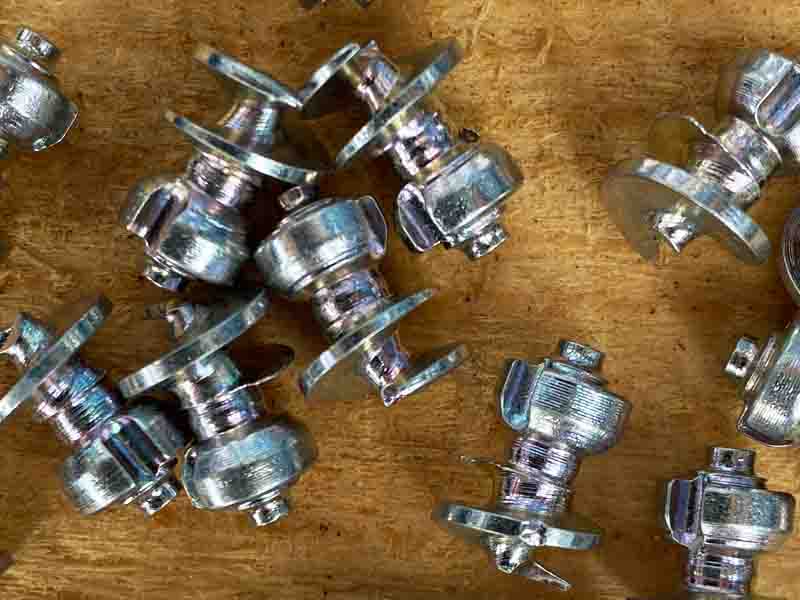
The quick studs - also known as spikes - are similar to the carbide pins of the traditional steel shoe. You may buy quick studs in two different sizes for additional anti-slide protection.
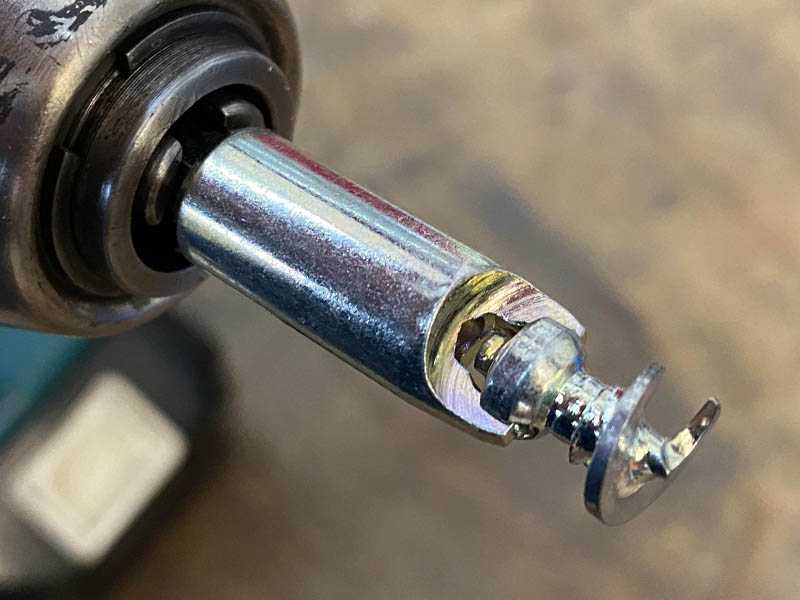
For the application of quick studs, you need a quick stud application tool. Please note that this adapter is available in two sizes.
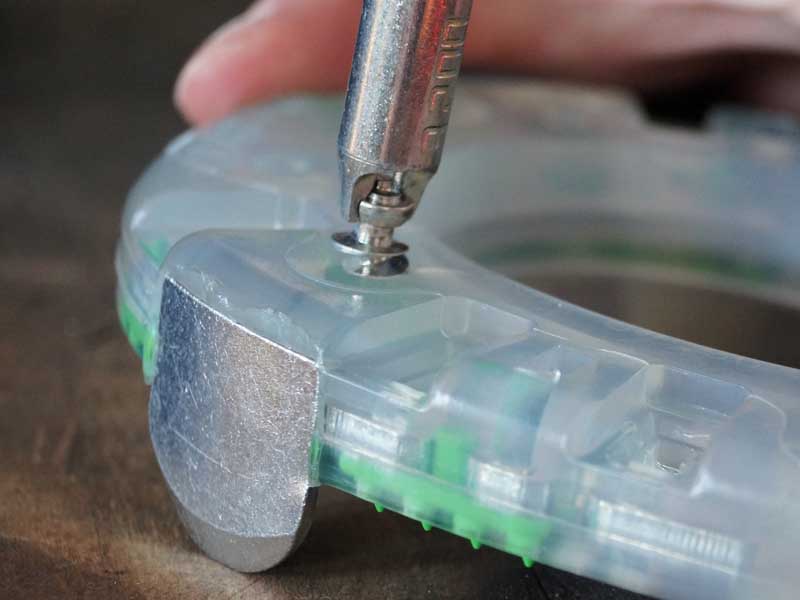
When screwing in the quick studs, make sure they are in the correct position so that no undesirable pressure is exerted on the hoof.

Even if the spikes, as a preliminary stage to studs, only minimally protrude above the synthetic cover of the horseshoe, they increase the risk of injury in a herd situation.
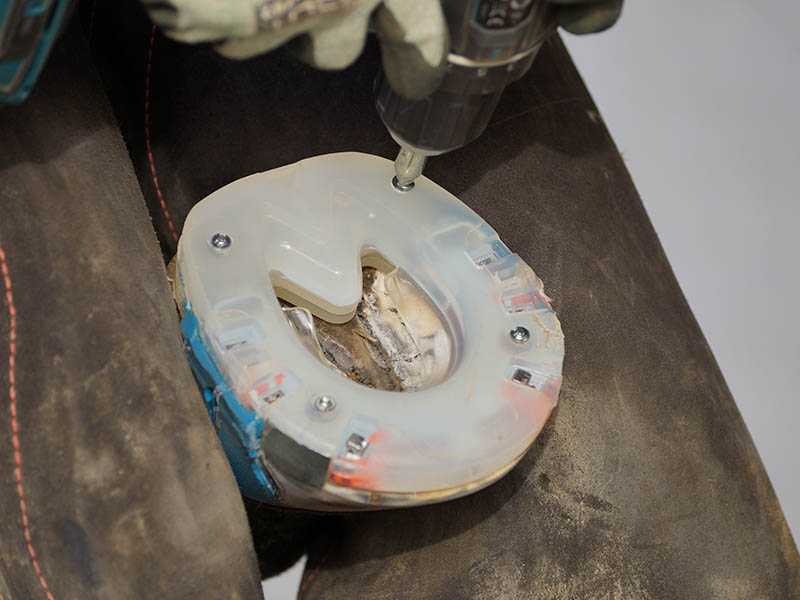
With most horses, the quick studs can even be screwed in afterwards - that is, when the shoe has already been nailed or glued to the horse's hoof.

Even with quick studs as an additional anti-slip protection, you must always adapt your riding style and speed to the surface and climatic conditions to avoid injuries.
Application and Safety Instructions when using Quick Studs (Spikes) for Extra Grip - VIDEO
In general, the application of the quick studs is simple and quickly done with a little technical skill. Depending on the horse's behavior, it is in principle even possible to subsequently install the spikes.
For all work, observe our currently valid Security Advices for working with our products as well as with the tools used. Even though the additional risk of injuries in a herd situation when using spikes is usually many times lower than with studs, you must remember to think about this when equipping a horseshoe with spikes.
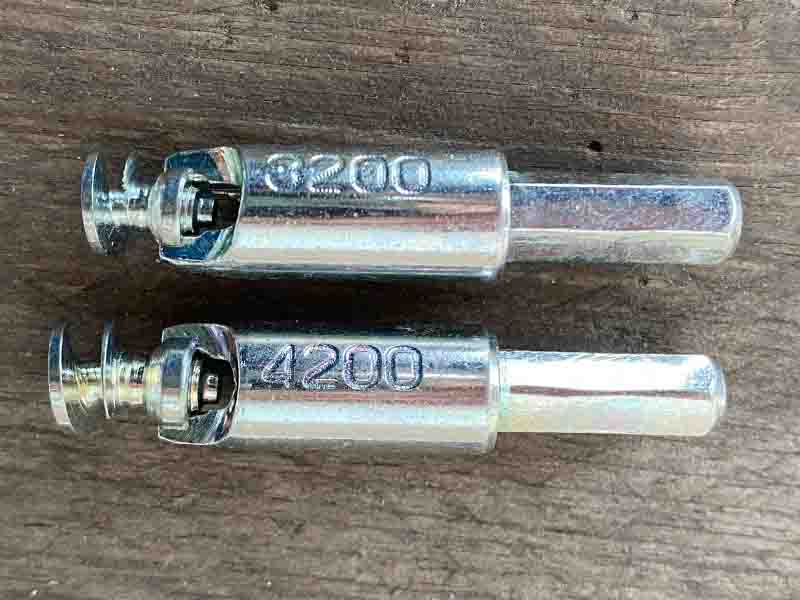
The Difference between M Spikes and L Spikes
The slightly larger L spikes are not suitable for use in the toe area of our STS horseshoes and neither for the pony sizes of our "Classic" model.
Otherwise, you can decide for yourself whether you want to use the M or L spikes for additional grip. Please make sure to also use the appropriate quick stud application adapter.
Even if the M spike fits into the L adapter in principle – the devil is in the details because the M spike has a less stable fit in the L adapter. This small instability can cause difficulties when screwing in the spike.
The Correct Position of the Spikes
In principle, the spikes can be placed wherever there is no metal core. However, they should be mounted in the area of the bearing edge of the hoof wall and not too close to the edge of the shoe.
The exact positioning and the number of spikes used is at the discretion of the farrier on site. In general, the options differ depending on the model of the horseshoe. Make sure that the quick studs are installed in the area of the bearing edge of the hoof wall. Otherwise, there could be pressure on sensitive areas of the hoof.
Depending on the model version, our newer horseshoes already have small flat dimples which are meant for the application of spikes. Please do not confuse these flat dimples with the production-related deeper holes of the earlier model versions, in which the small spikes would literally disappear.
If you have a horseshoe without the small dimples for the spikes application or if you would like to position them in a different place, we advise you to use a marker and a wood drill bit to prepare such a dimple yourself.
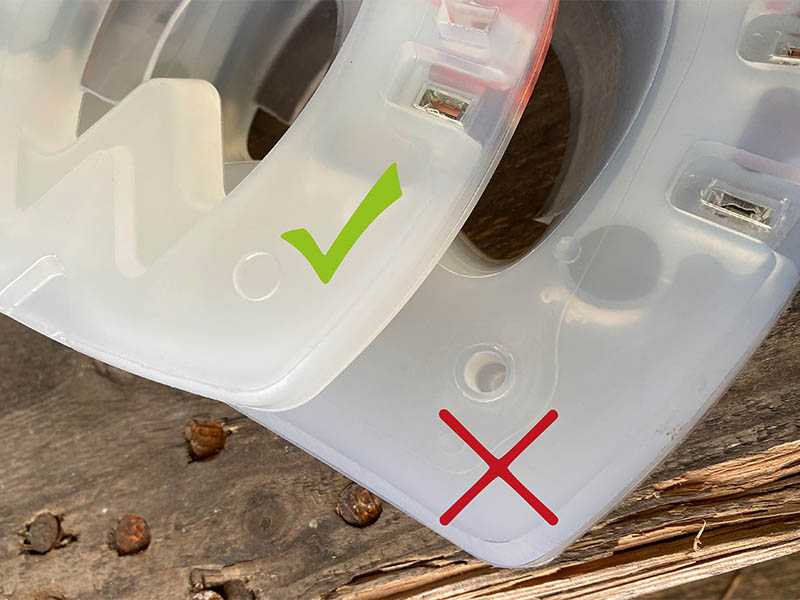
Quick Stud Application
- Preparation of a flat dimple (if it is already prefabricated, this step is not necessary):
- Mark the desired location of the quick stud on the horseshoe.
- Use your wood drill bit to drill a flat dimple (about 1 or 2mm) into the synthetic material at the marked positions.
- When placed in this dimple, the quick stud won't slide away so easily when screwed in.
- Deeper predrilling is counterproductive; otherwise the quick stud would no longer have a secure hold in the plastic sheath.
- Then place the quick stud on the matching adapter (M/L). The two pegs of the adapter must fully fill the two grooves of the quick stud to ensure that the stud has a secure fit.
- After that, you place the tip of the quick stud in the center of the dimple.
- Slowly and vertically screw the quick stud into the synthetic sheath with moderate pressure and at slow speed. You can stabilize the adapter with the other hand.
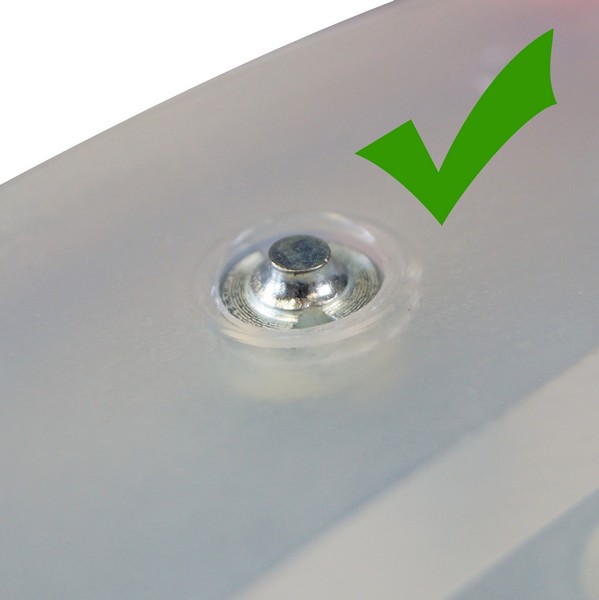
The correct fit of the quick studs in the synthetic sheath of the horseshoe:
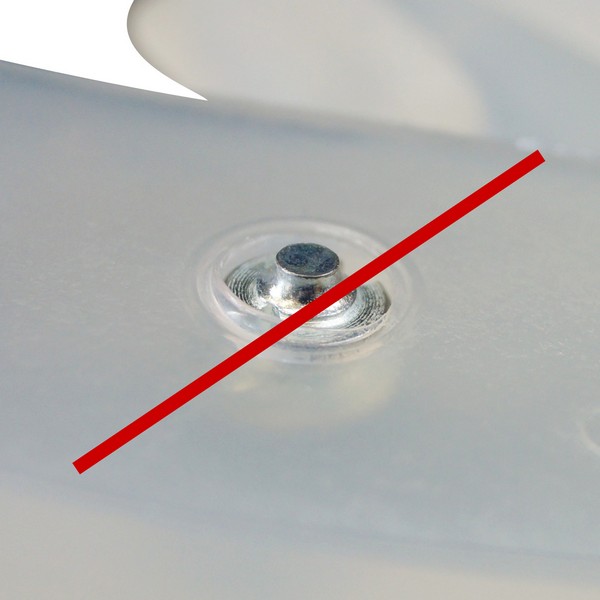
- The quick stud fits perfectly and provides additional grip when only the small hard metal head overtops the surface of the horseshoe.
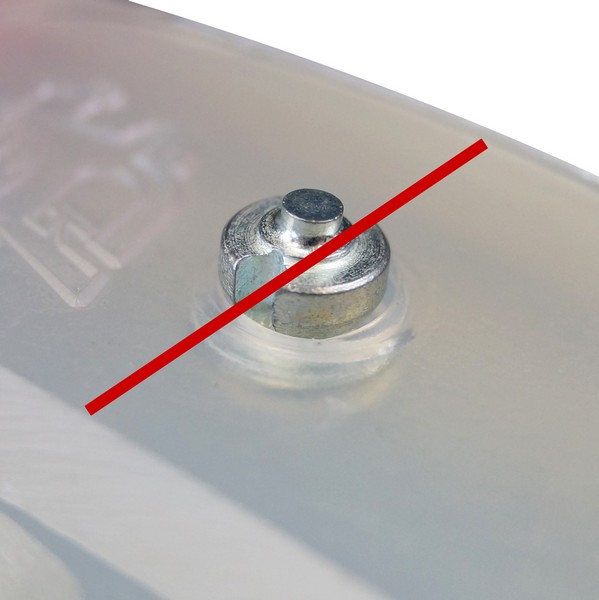
What to avoid when applying quick studs:
- If the quick stud isn't screwed in enough, it will easily get lost and also represents a risk of injury for both human and horse.
- If the quick stud is screwed in too far, it can't provide additional grip. In addition, its tip might break through the hoof side of the horseshoe.
- If the quick stud is too close to the edge of the horseshoe, the plastic may tear out. Therefore, make sure that the distance between the quick stud and the edge of the horseshoe is large enough.
- In order to ensure durability, the quick stud should not be overwound.
Product Features
| Article | spikes, quick studs, small studs for additional grip |
|---|---|
| Article Number | 000500, 000502 |
| Made in | Italy |
| Function | anti-slip protection, anti-slide protection, anti-skid protection, additional grip |
| Riding Styles and Disciplines | among others: leisure riding, cross-country, trail riding |
| Thread Size | M and L |
| Matching Alternative Horsehoes | In principle, the quick studs can be combined with all composite and pure plastic horseshoes. |
| Usage | At your own discretion; adapted to ground conditions, riding discipline and safety in a herd situation. |
| Application | With a cordless screwdriver and quick stud application tool - also known as spike adapter - of the appropriate size. |
| Risk of Injuries in Herds | The use of quick studs can increase the risk of injuries in a herd situation. We cannot be held liable for any damage that may occur. Please read and follow our safety instructions. |
| Safety Information | can be found under FAQ → Safety Information |
| Packaging Unit | sold in pieces |
| Shipment | worldwide; deliveries to France, Switzerland and Canada are carried out by our our country representatives |
Tipps & Tricks
At this point, we would like to use this opportunity to give you some additional information that we find helpful in everyday life.
If you would like to contribute something yourself, you are welcome to leave us a review and tell others about your experience.
Quick Studs as an Additional Protection against Abrasion
In the first place, of course, quick studs provide additional grip and thus serve as anti-slip protection. In addition, they also contribute to the durability of the horsehoe because they act as an additional abrasion protection.
Facilitated Application through Heating
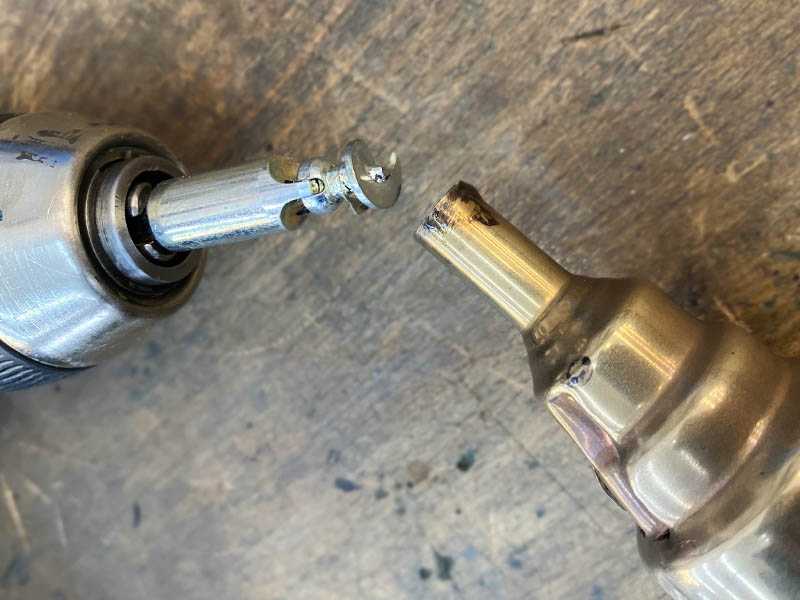
Especially (but not only) in winter, at lower temperatures, the application of quick studs can be a challenge. The solution is very simple: The quick studs can be effortlessly screwed into the plastic sheath if you heat their tip slightly beforehand.
